
10 Tips for trimming a perfect pot
Trimming clay pots can be a fun and creative way to add character and design to your pottery! Here are some top tips for trimming your clay pot:

1. Wait for the Right Dryness
- Make sure your clay pot is at leather-hard consistency before you start trimming. It should be firm enough to hold its shape but still soft enough for the trimming tools to carve into it without cracking.
2. Use the Right Tools
- Loop tools are essential for trimming and carving. You can also use a rib tool to smooth out the surface after trimming.
- X-Acto knives or carving tools can be used for intricate details.
- A trimming wheel or bat (a flat board with a rotating platform) helps for easier, more consistent trimming.
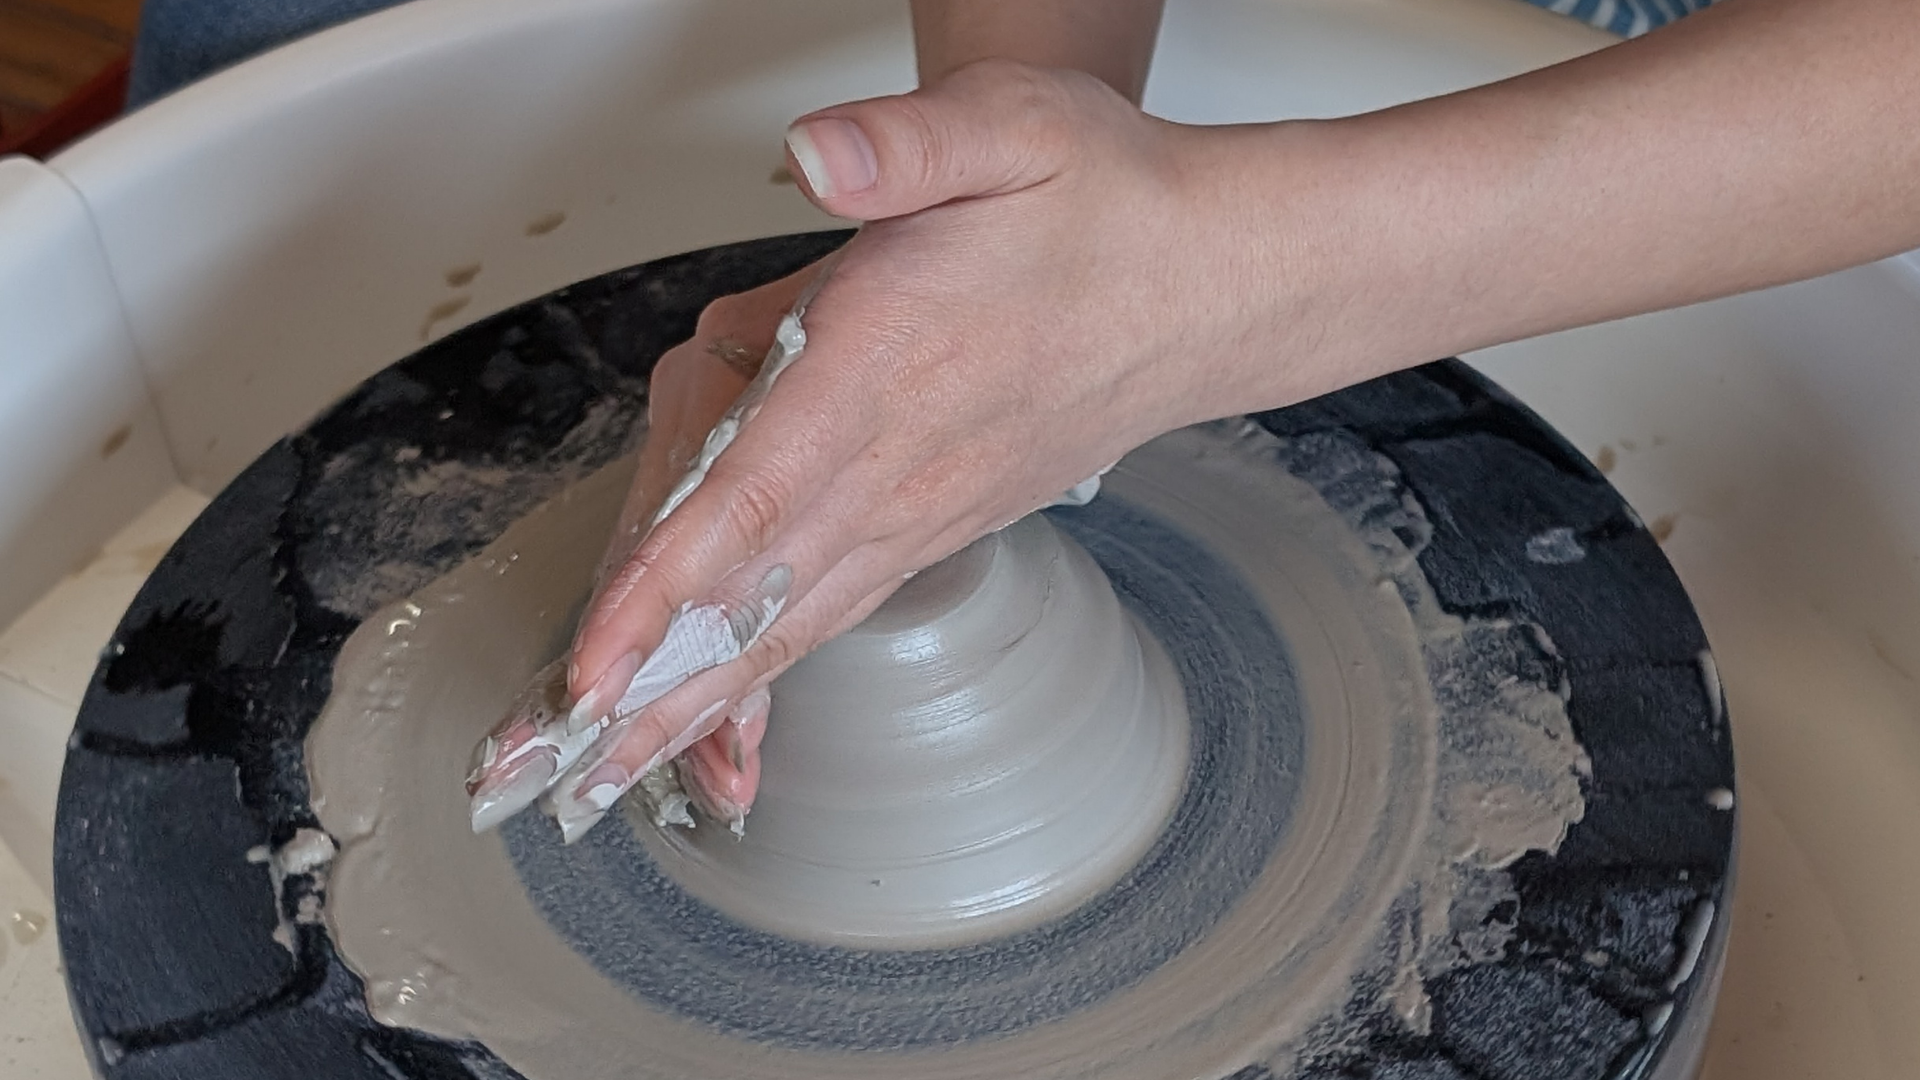
3. Stabilize the Pot
- Secure the pot to a bat or a turning wheel, so it spins smoothly while you trim. If you’re not using a wheel, consider using a sponge or towel under the pot to stabilize it and prevent any wobbling.
4. Trim Gradually
- Start by trimming away small amounts of clay at a time. This gives you more control and allows you to refine the shape without removing too much material.
5. Shape the Base
- When trimming, focus on shaping the base of the pot so that it’s smooth and even. The foot ring should be slightly raised, and the bottom should be concave (curving inward) for balance.
6. Keep Your Work Surface Clean
- Keep your trimming tools and work area clean to avoid dust or debris from scratching or marring the surface of the pot. A damp sponge can help remove clay scraps while you’re working.
7. Avoid Over-Trimming
- Be mindful of the thickness of the walls and base. Over-trimming can weaken the pot, and if you remove too much clay, it could collapse during firing. Leave a bit of clay for structural integrity.
8. Trim the Lip for Evenness
- If your pot has a lip, trim around it for symmetry. Gently round the lip to give it a finished look, ensuring it doesn’t have sharp edges unless that’s your design.
9. Texture and Design
- After trimming, you can add textures, carve patterns, or incise designs. Be sure to carve delicately to avoid cracking the surface, especially around the rim and foot.
10. Check for Symmetry
- Periodically check your pot from different angles to ensure it is symmetrical and balanced as you trim. This can help catch any uneven spots before they become problematic.
With these tips, you’ll be able to trim your clay pots efficiently while creating smooth, refined pieces! Happy pottery-making!
Check out the upcoming Clay workshops where we will teach you how to make and trim beautiful clay pots. https://happyhandspottery.ca/
"Trimming clay isn’t just about shaping—it’s the art of refining every small detail. A well-placed cut can transform a simple pot into a masterpiece."

Related Articles
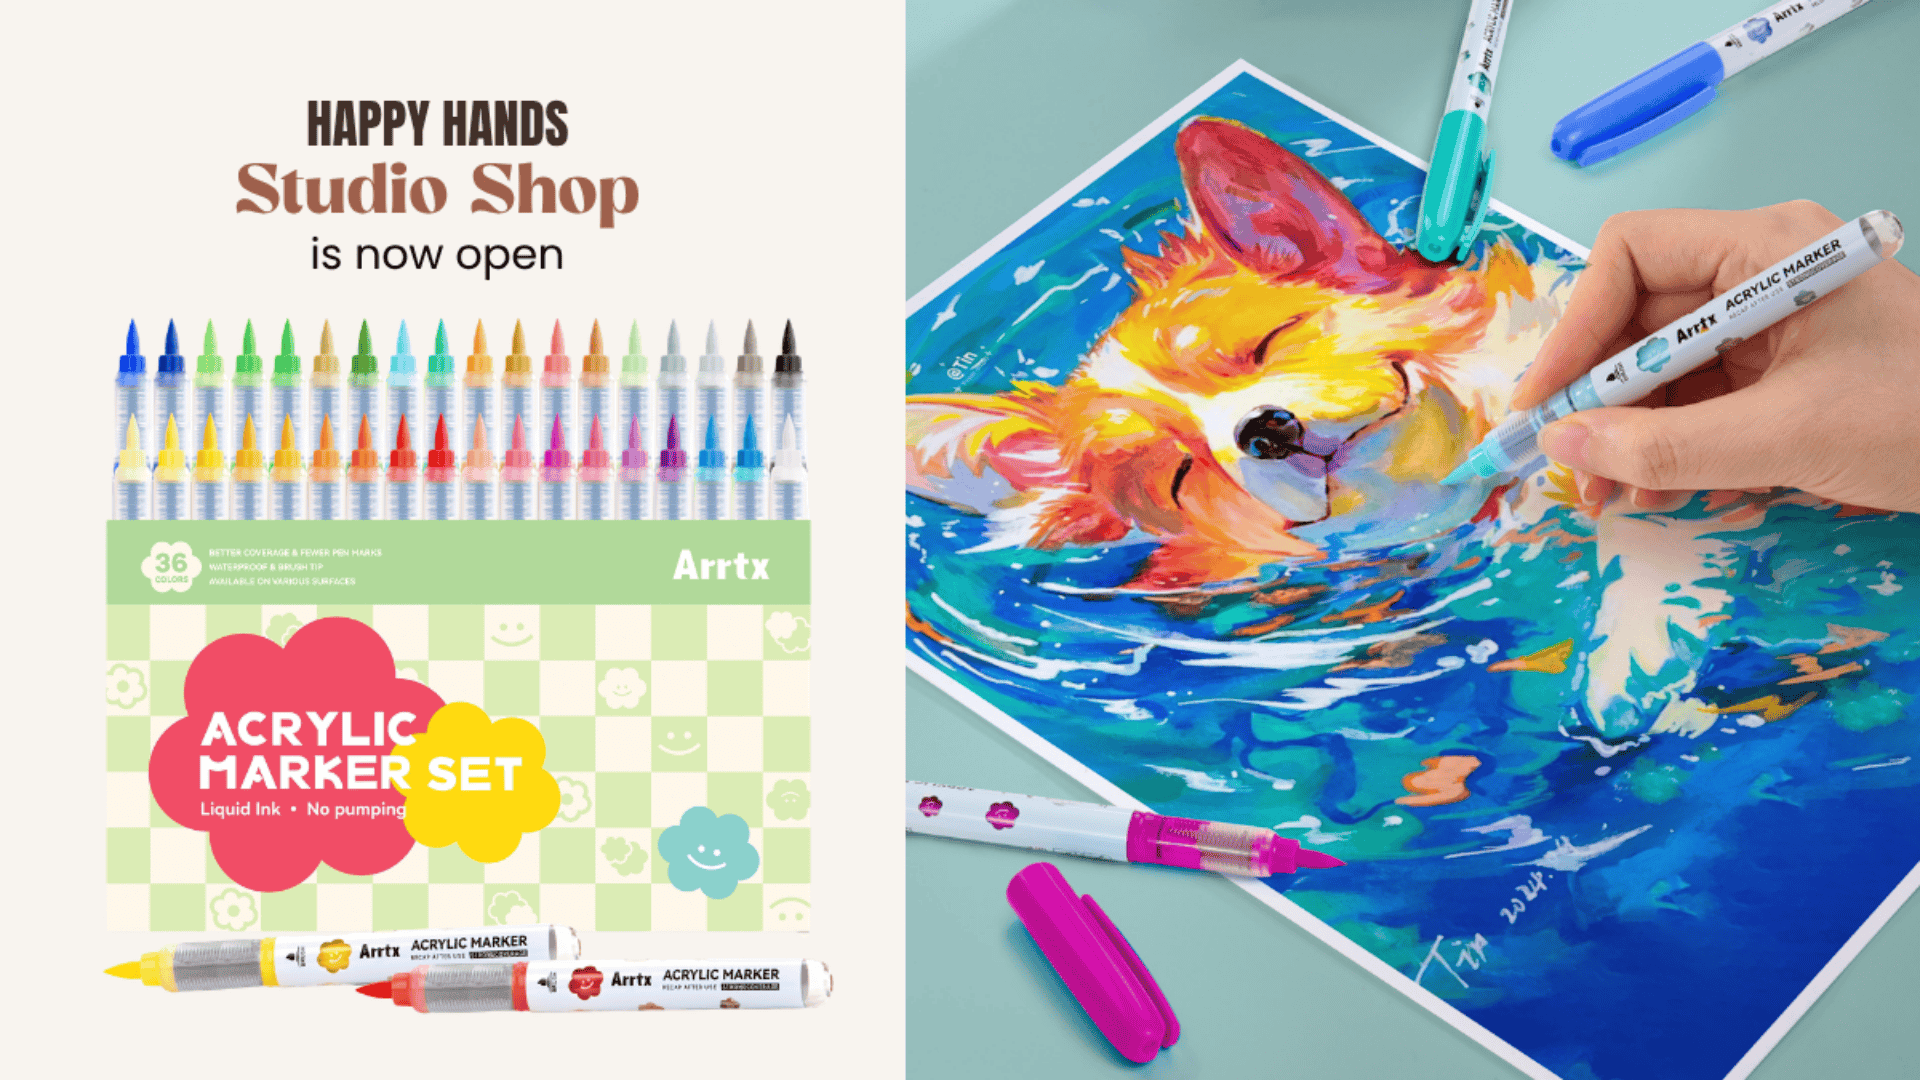
Happy Hands Pottery & Art Studio Launches Studio Shop
Happy Hands Pottery and Art Studio launches Studio Shop featuring affordable Arrtx Acrylic Markers, Mayco Stroke & Coat Pottery Glazes, and Ceramic Blind Boxes

Why Join an Art Competition? A Personal Reflection + Invitation to Start
Thinking about entering an art competition? Discover the benefits, personal insights, and why taking the leap can open doors for emerging artists—plus an opportunity to get started.
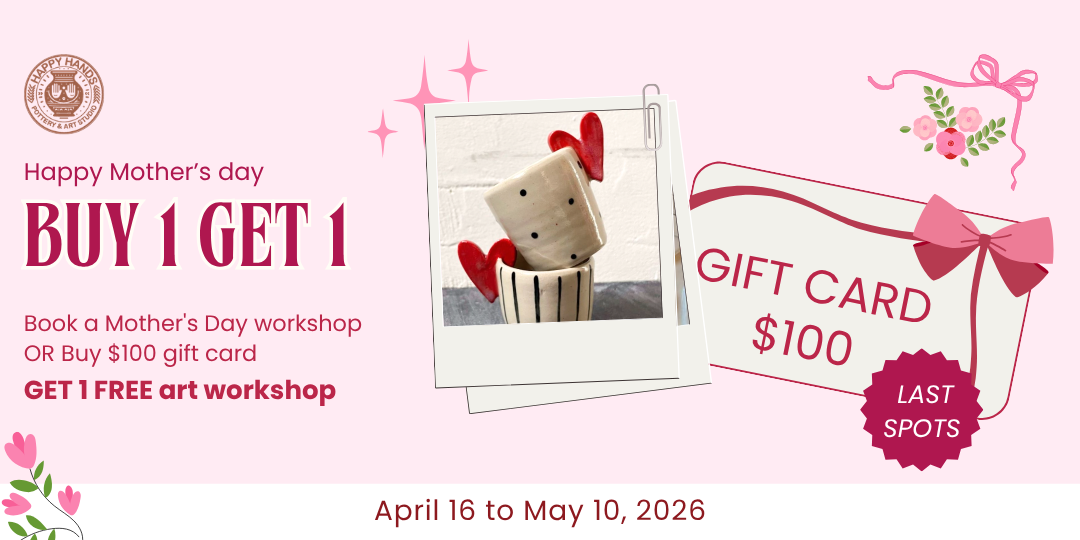
Celebrate Mother's Day with Pottery, Creativity & Special Offers at Happy Hands Studio
Celebrate Mother's Day with a meaningful pottery workshop at Happy Hands Pottery and Art Studio. Create keepsakes together & get exclusive offers - buy 1 workshop, get 1 free art class.
Easter Activities in Brampton for Kids & Families: Create Memories This Easter
Discover the best Easter activities in Brampton for kids and families. From pottery workshops to creative crafts, find fun, hands-on experiences for Easter Sunday. Book your family adventure today!
News & Events
Happy Hands Pottery & Art Studio Launches Studio Shop
0 comments on "10 Tips for trimming a perfect pot"