
Beginner Pottery Tools: The Complete Studio Guide
You’ve watched pottery videos and want to start. But then you see the price tags: professional tool sets for $150+, specialty tools in every category, equipment lists that look endless. One question keeps nagging: Do you really need all of this?
Here’s the truth we’ve learned after teaching beginner pottery: most of those tools sit in a box unused. You don’t need expensive equipment or a full studio setup to start pottery at home. What you need are the right tools for the fundamentals – not more, not less.
We’ve tested hundreds of pottery tools with thousands of beginner students. Some investments are worth it. Others? Pure marketing hype. In this guide, I’ll walk you through exactly which tools matter for beginners, which ones deliver real value, and how to start pottery without breaking the bank.
By the end, you’ll know what to buy first and what to skip – based on real studio experience, not product hype.
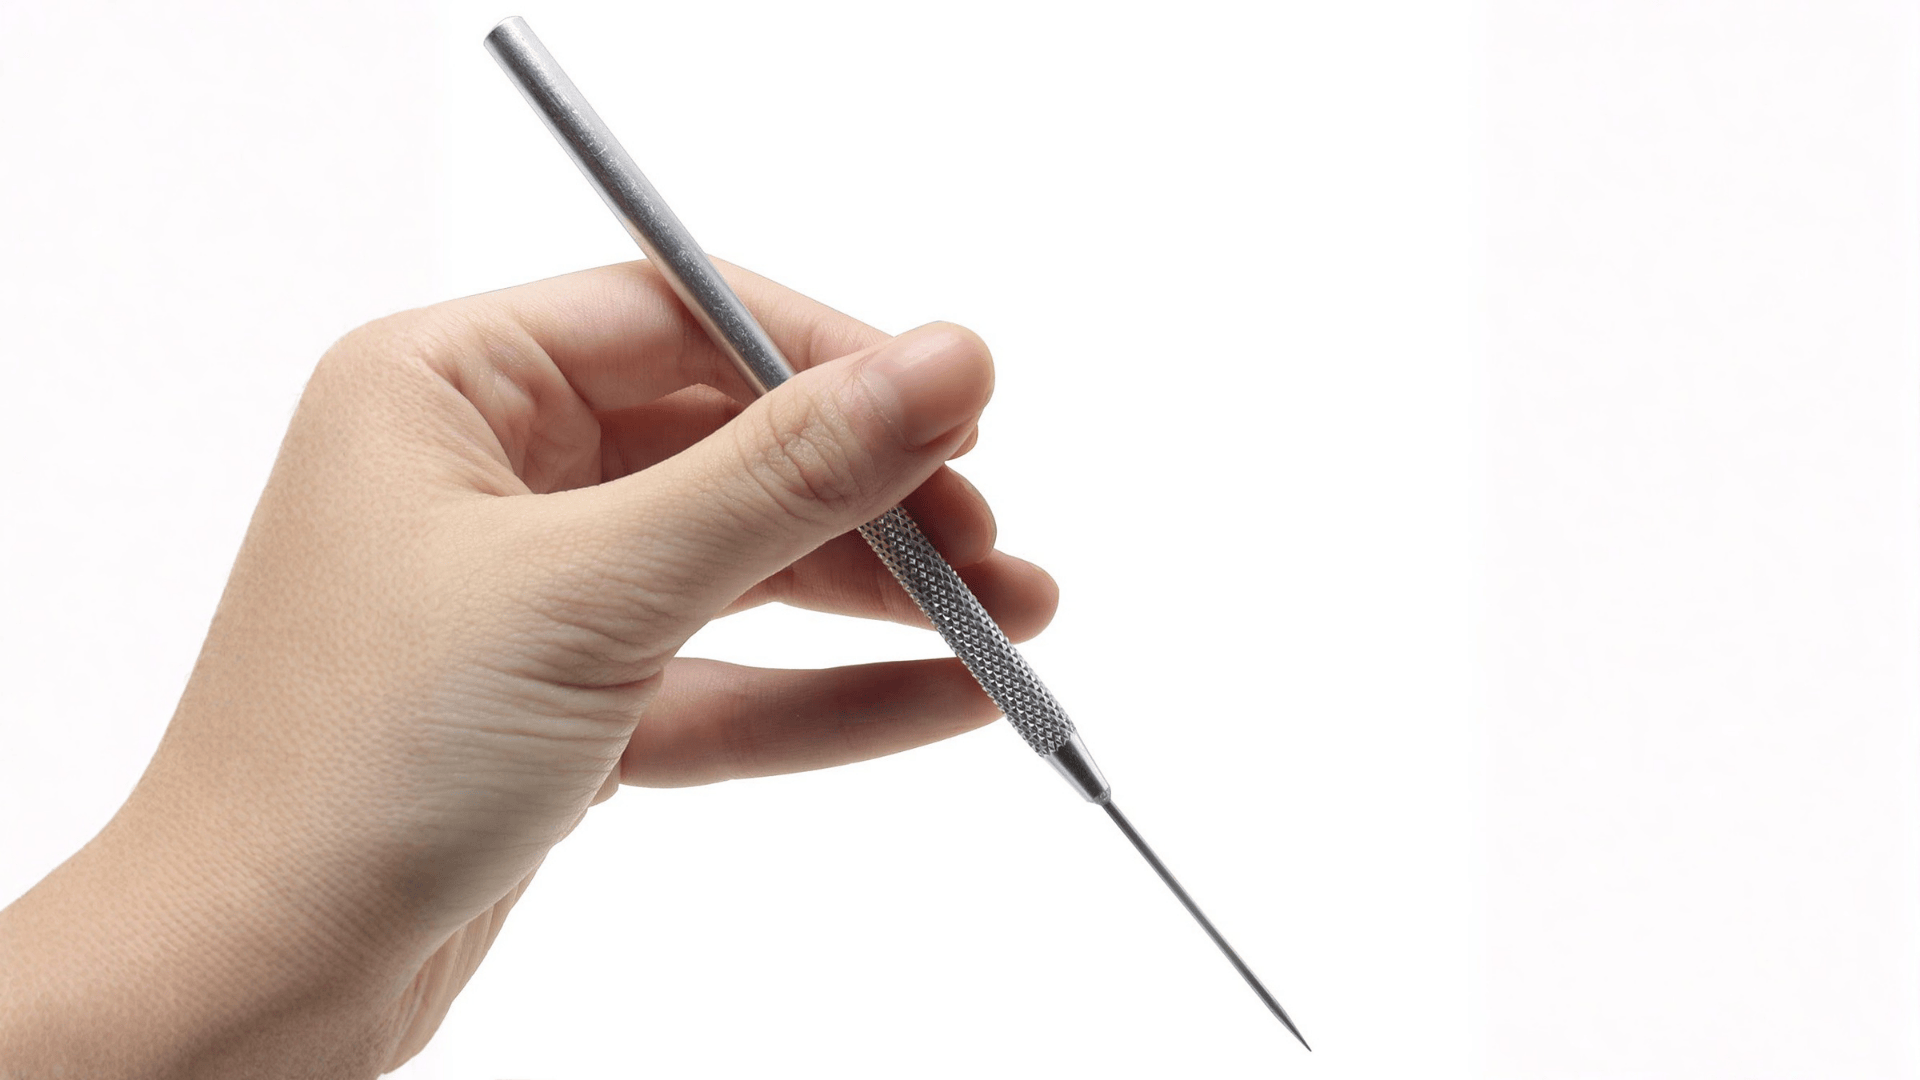
The needle tool is the unsung hero of beginner pottery. If you buy only one tool, make it this one.
Best for: Refining edges, trimming clay, creating lines and details, fixing mistakes
Why it matters: In our beginner classes, we use the needle tool in every single session. Students use it more than any other tool. It’s where 80% of handbuilding happens. A good needle tool is the difference between a rough, unfinished look and polished, professional-looking work.
What works:
- Works for almost every beginner technique
- Affordable (under $10)
- Simple to use with minimal learning curve
- Lasts years with basic care
- Essential whether you use handbuilding or wheel throwing
When it falls short:
- Tip dulls over time (but stays functional)
- Can break if dropped on tile (we’ve done it)
- Requires gentle hand so you don’t gouge the clay
The wire clay cutter is the second tool every beginner needs. It cuts through clay cleanly without smooshing – which is harder than it sounds.
Best for: Cutting clay slabs, separating pieces, cutting clay from the wheel
Why it matters: When beginners first start, they use fingers or knives, which compress the clay and create messy edges. A wire cutter solves this instantly. One clean motion, and you have a smooth cut. The difference in finished appearance is dramatic.
What works:
- Creates clean cuts without clay distortion
- Works on leather-hard and soft clay
- Doubles as a wheel-cutting tool
- Durable – wire lasts years
- One of the cheapest tools you’ll buy
When it falls short:
- Wire can rust if not dried after use
- Need to be careful not to pinch fingers
- Thin wire can snap if forced
Shop Wire Clay Cutter on Amazon
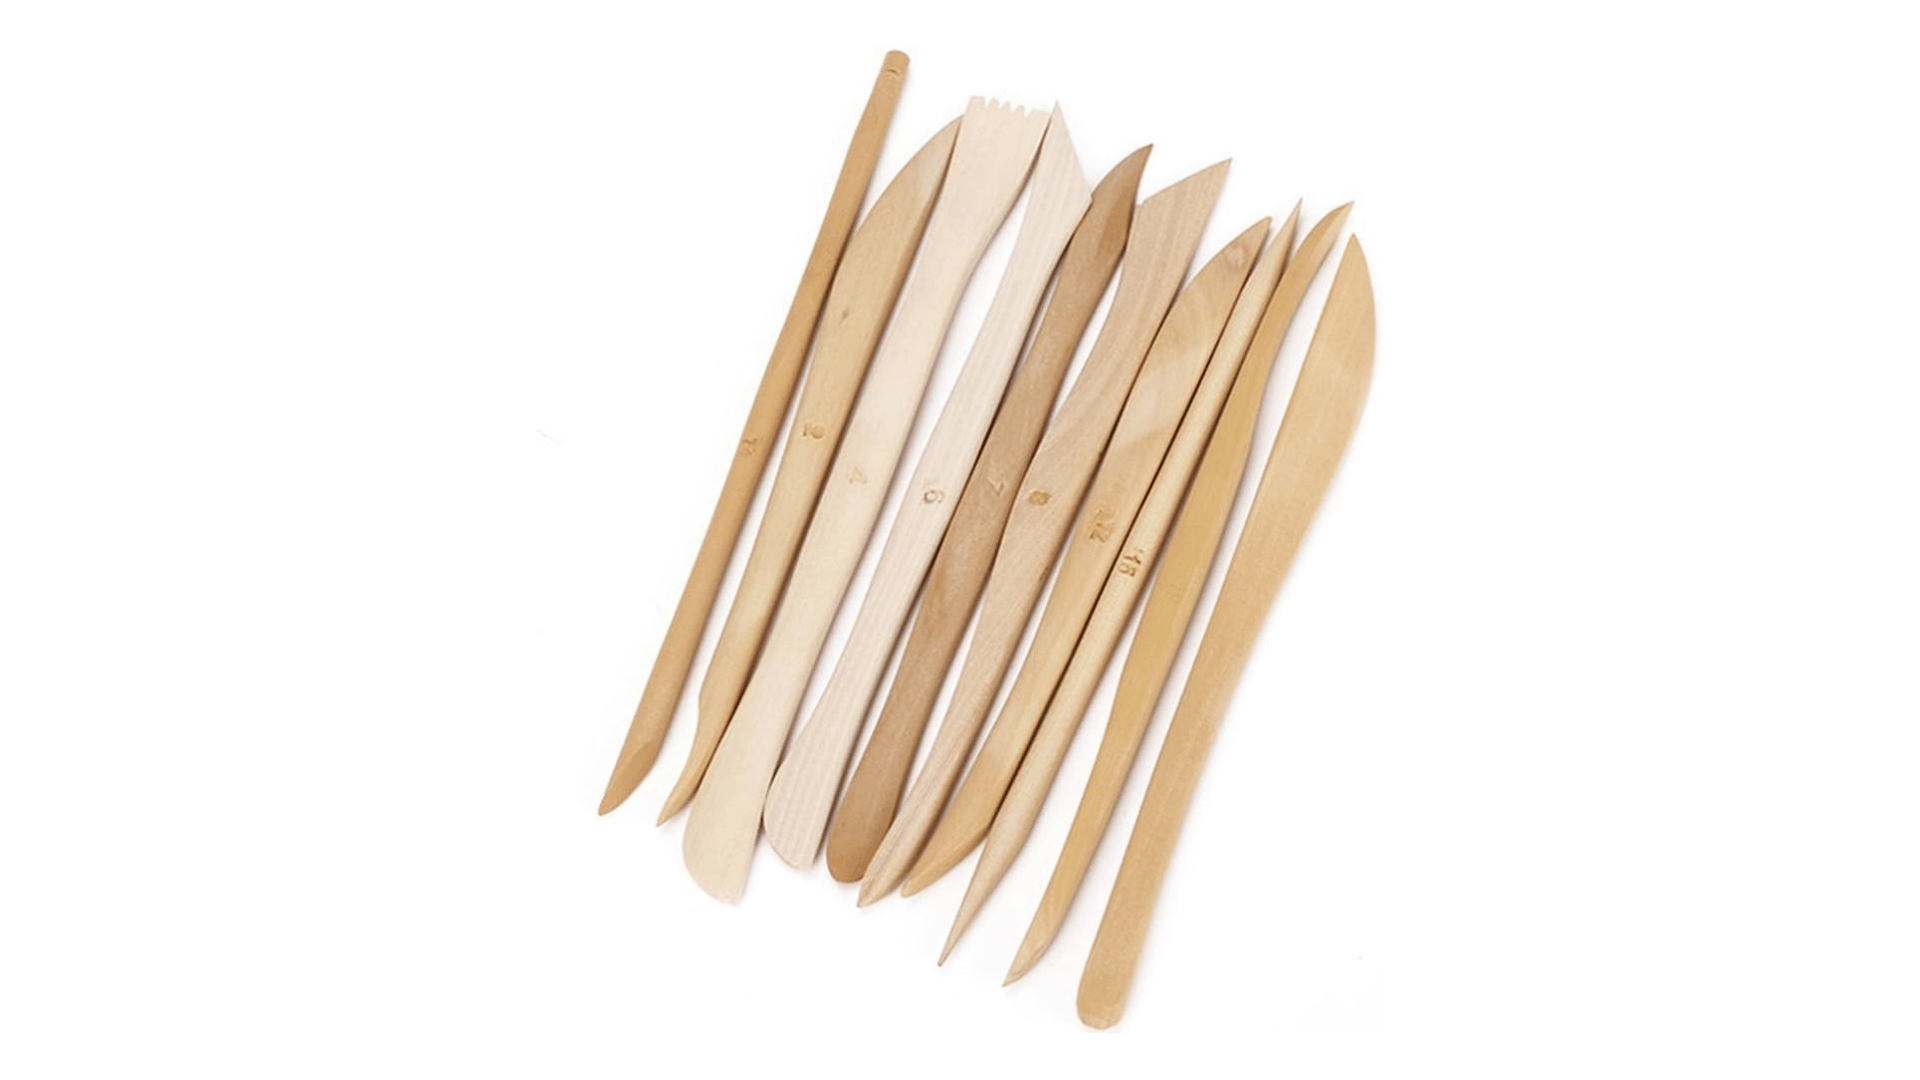
The wooden modeling tool has two ends and infinite possibilities. This single tool does multiple jobs.

Best for: Smoothing surfaces, creating texture, building up edges, detailing
Why it matters: The flat end smooths and refines. The pointed end creates details. Beginners love this tool because it does so much – they feel like they have “enough” tools without buying a whole set. In our Friday afternoon kids’ classes, the wooden modeling tool is usually the second most-used tool after the needle tool.
What works:
- Two tools in one (flat and pointed ends)
- Comfortable wooden handle (doesn’t get cold)
- Great for smoothing soft clay
- Perfect for beginners still learning control
- Affordable and easy to understand
When it falls short:
- Wood can splinter over time
- Softwood versions wear faster than hardwood
- Not ideal for very hard clay
Shop Wooden Modeling Tool on Amazon
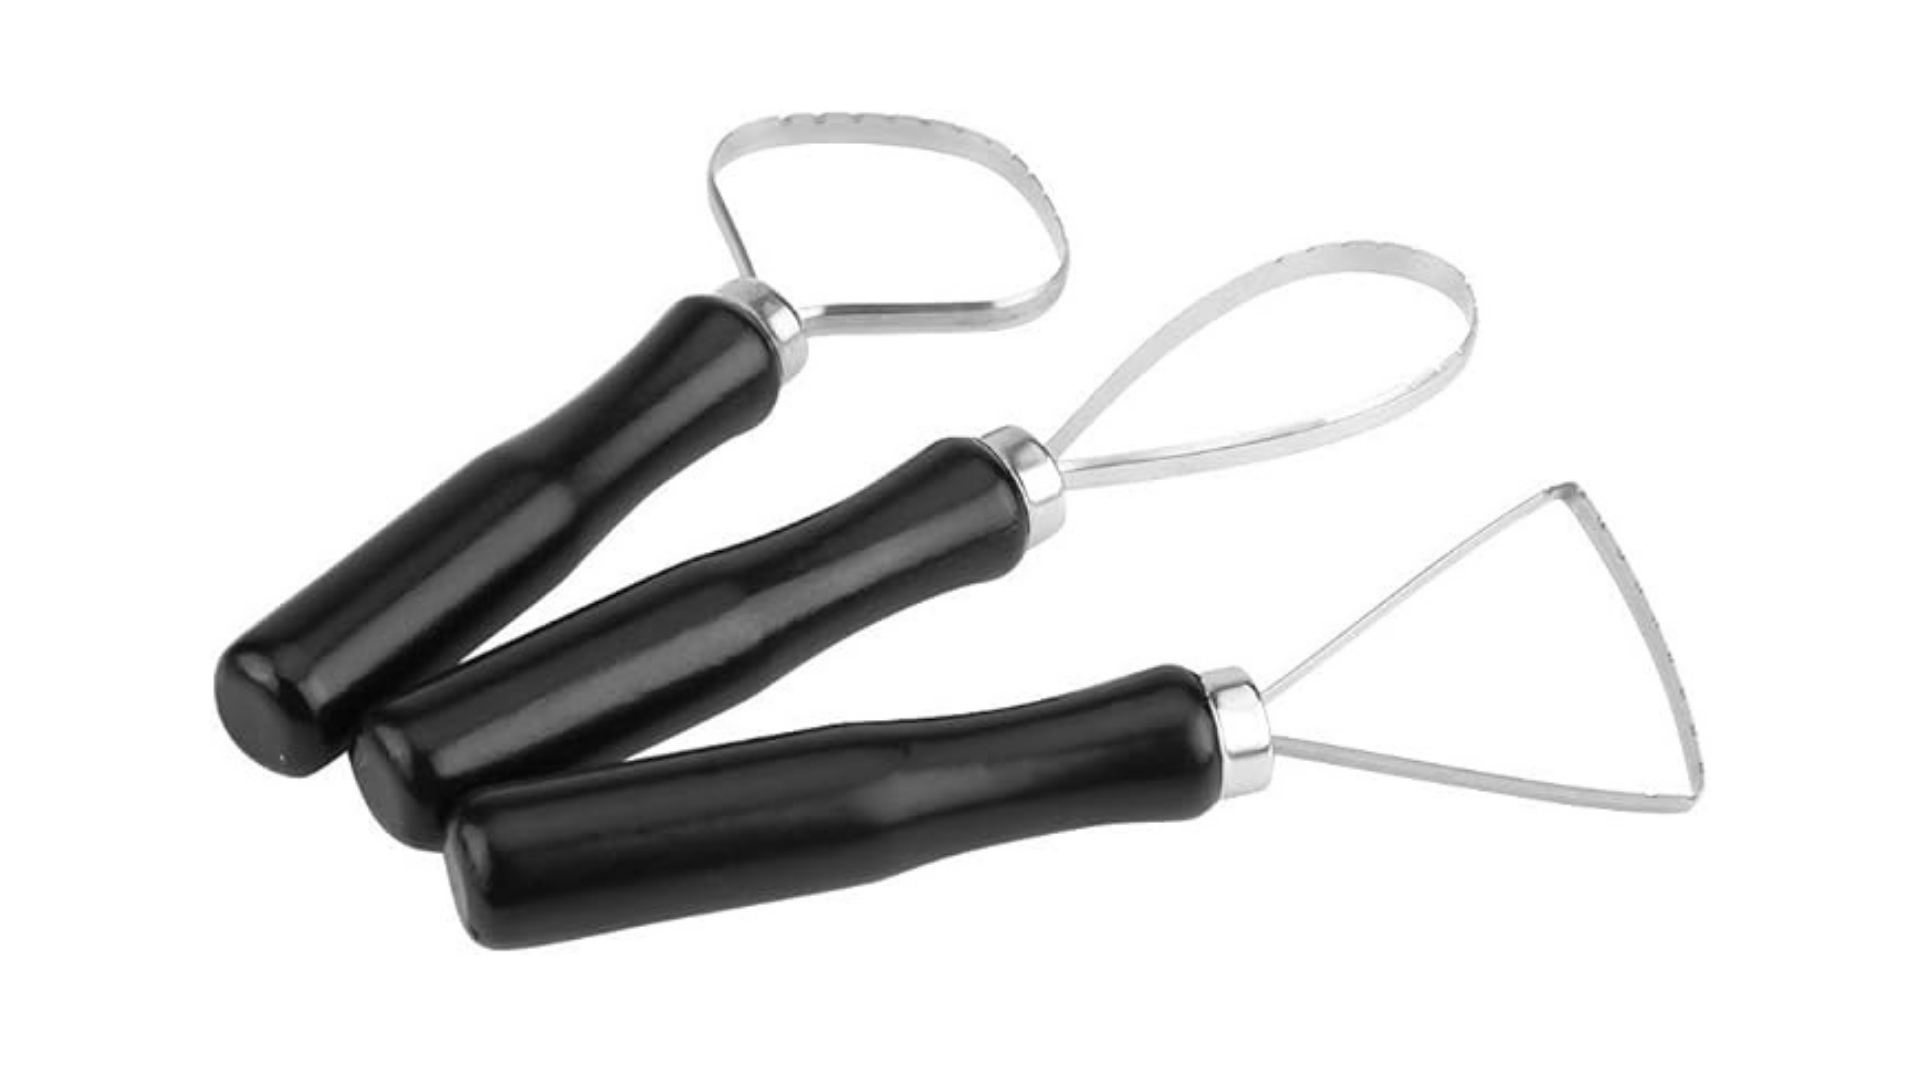
The loop tool is the specialty tool that becomes a favorite fast. This tool has a dedicated following. Once a beginner understands what it does, they start using it constantly.
Best for: Carving, removing clay, creating smooth lines, handbuilding details
Why it matters: It removes clay precisely, creates smooth curves, and helps refine handbuilt pieces. Not for everyone at first, but once beginners “get it,” it’s essential.
What works:
- Removes clay without scratching
- Great for carving decoration
- Sharp loop stays effective longer than metal tips
- Perfect for refining edges
- Creates professional-looking details
When it falls short:
- Takes beginners a while to figure out how to use it
- Loop can bend if pressured wrong
- You’ll use it more once you move beyond basics
The rubber rib saves unfinished-looking pieces and makes them polished. A rubber rib transforms rough, fingerprint-covered clay into smooth, finished-looking work.
Best for: Smoothing surfaces, blending seams, creating texture, finishing edges
Why it matters: Our younger students especially love this because their hands leave marks in clay, and a quick pass with the rib fixes it. It’s also one of the most affordable tools that creates a noticeable difference in finished quality.
What works:
- Rubber doesn’t scratch clay
- Makes rough work look refined
- Great for beginners who worry their pieces look rough
- Incredibly durable (we’ve had the same one for 5+ years)
- Multiple textures on one tool (flat, rounded, wavy)
When it falls short:
- Rubber can stick if clay is too wet
- Different ribs have different textures
- Won’t fix structural problems (only surface issues)
The rubber rib is one of the simplest tools in pottery, yet it makes one of the biggest visual differences. It turns rough, fingerprint-covered clay into smooth, refined surfaces in just a few passes.
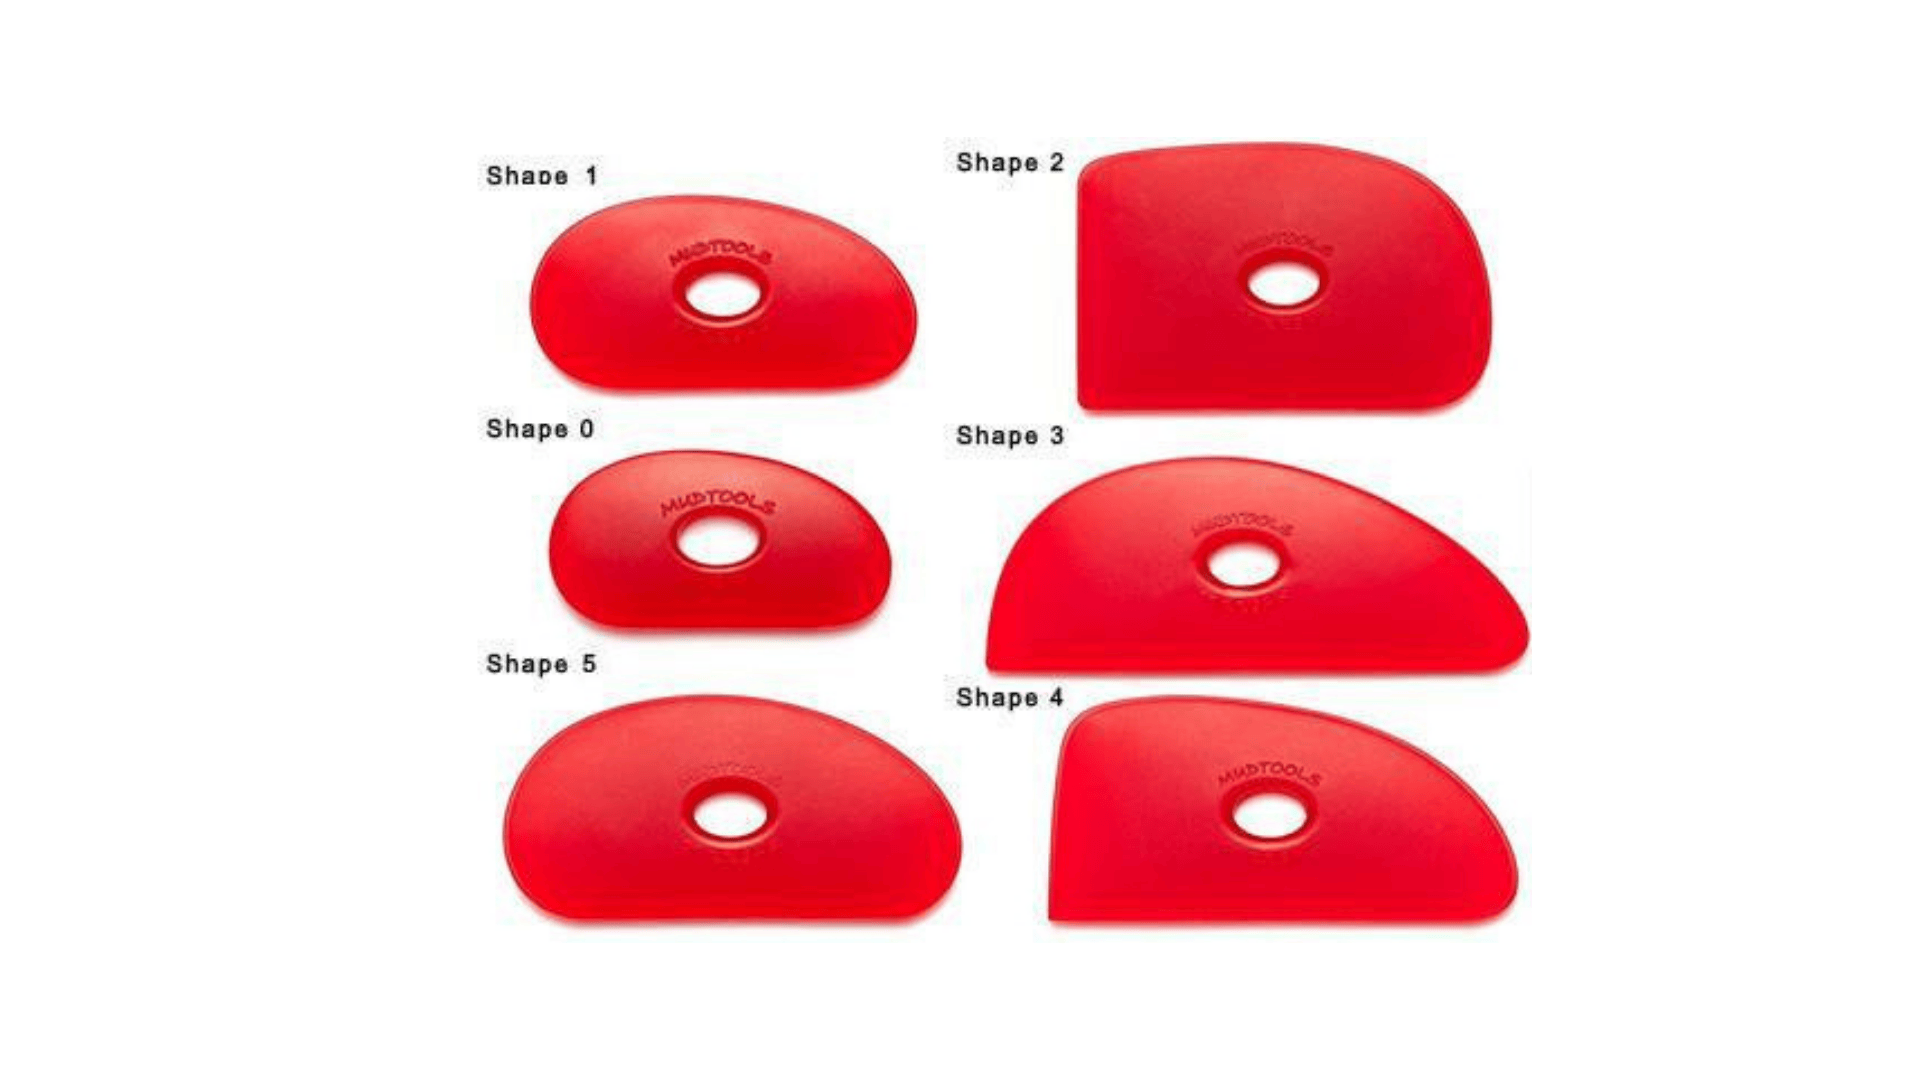
Best for: Smoothing surfaces, blending seams, compressing clay, finishing edges
Why it matters: Beginners often worry their pieces look rough or messy because fingerprints and small marks show easily in soft clay. A rubber rib quickly smooths those imperfections and compresses the clay surface, helping pieces look cleaner and more finished. It’s one of the easiest ways to improve the final look of pottery without extra effort.
What works:
- Flexible rubber glides smoothly over clay
Removes fingerprints and small surface marks - Helps compress clay for stronger walls
- Easy for beginners to control
- Durable and long-lasting
- Different edges allow multiple shaping techniques
When it falls short:
- Can stick slightly if the clay is very wet
- Different shapes work better for different pieces
- Only improves surface finish, not structural mistakes
Beyond these five essentials, there are tools that expand what you can do. A pottery sponge moistens clay and smooths seams – something fingers alone can’t do as effectively. The fettling knife comes into play when you’re ready for carving details and trimming leather-hard clay. A wooden paddle flattens clay and helps with hand-building larger pieces. The ball stylus tool adds texture and creates dots and patterns that make work look more intentional. Texture tools in a set give you variety for creating designs.
Each of these tools serves a purpose. But here’s what matters: you don’t need them all to start. You need them as your skills develop and you discover what you actually like to make.
| Tool | Works Best For | Price | Good For Beginners |
| Needle Tool | Refining edges, detailing | $5–$12 | Yes |
| Wire Clay Cutter | Cutting clean slices | $4–$9 | Yes |
| Wooden Modeling Tool | Smoothing, detailing | $3–$8 | Yes |
| Loop Tool | Carving, removing clay | $6–$12 | Eventually |
| Rubber Rib | Smoothing, finishing | $5–$10 | Yes |
| Pottery Sponge | Moistening, seam smoothing | $3–$7 | Yes |
| Fettling Knife | Trimming, carving | $7–$14 | Later |
| Wooden Paddle | Flattening, hand-building | $4–$9 | Yes |
| Ball Stylus Tool | Texture, dots, patterns | $4–$8 | Yes |
| Texture Tools (set) | Creating patterns & designs | $8–$15 | Yes |
| Basic Kit (all-in-one) | Complete starter set | $25–$40 | Yes |
Understanding What Actually Matters
More tools doesn’t mean better results. This is the biggest misconception beginners have.
What actually matters is tools that do fundamental tasks – smoothing, cutting, detailing, refining. These core tools handle 95% of beginner handbuilding. Everything else is specialty work for later.
The all-in-one starter kits include everything partly to make you feel prepared. But here’s what happens: most tools sit unused. That’s not the kit’s fault. It’s the nature of pottery. You’ll discover which tools you prefer through making things.
How to approach this:
Start with 2-3 essentials. A needle tool, wire cutter, and wooden modeling tool cost under $20 total. You can do most beginner projects with these. Then add tools based on what you actually make. Making lots of texture? Get the ball stylus. Doing detailed carving? Add the loop tool. This approach wastes zero money.
Quality matters more than quantity. A $10 needle tool from a good maker beats a $30 kit where half the tools are useless. In our studio, we’ve watched beginners succeed with minimal tools and others with closets full of equipment. The difference isn’t the tools – it’s practice and focus.
Getting Started
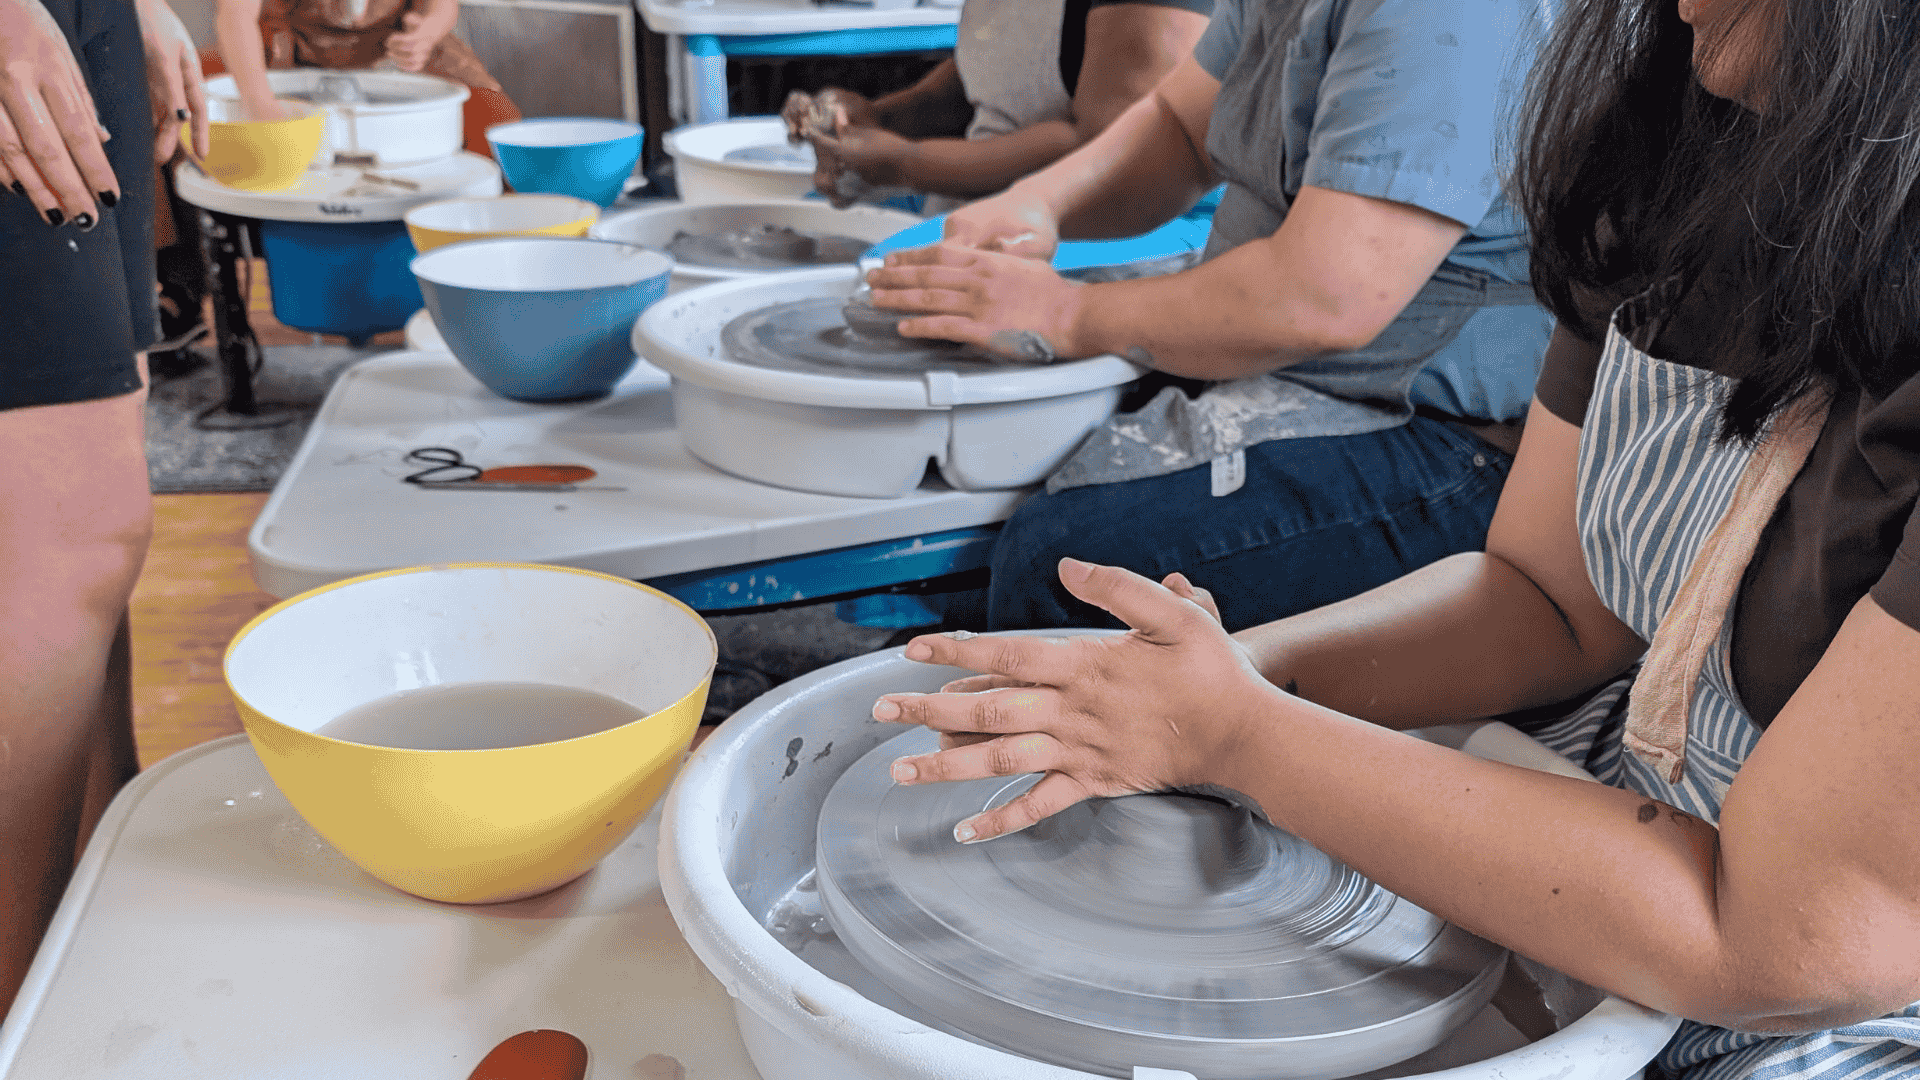
Many beginners ask whether they should teach themselves at home or take a class. The truth: both work, but they have different speeds.
Teaching yourself, you’ll figure things out through trial and error. This takes longer but builds problem-solving skills. In a class, you see what works immediately and get feedback on technique that would take months to discover alone. Either way, start with the basics – don’t buy 50 tools thinking they’ll make you better faster.
One thing we’ve noticed: beginners who start with just a few quality tools and one good learning method – whether that’s a class, YouTube, or a book – progress much faster than those who have everything but no direction.
If you’d like hands-on guidance in a supportive environment, we offer weekly beginner handbuilding workshops at Happy Hands Pottery and Art Studio. Most of our students find that even a few in-person sessions answer more questions than weeks of solo practice. You get to see what works, ask questions in the moment, and avoid common beginner mistakes.
Learn about our beginner workshops
Questions Beginners Ask About Pottery Tools
Do I need to buy an expensive kit, or is it better to buy tools individually?
Individual tools are better. Kits include many tools you won’t use. Buy 2-3 basics ($15–$20), then add tools based on what you actually do. You’ll save money and know every tool gets used.
Can I use household items instead of pottery tools?
Some work. Forks, butter knives, and wooden spoons handle some tasks. But they’re not designed for clay and wear out fast. A real needle tool costs $8 and lasts years. Household alternatives create frustration and waste time. Real tools are affordable enough to justify.
Will these tools work for both handbuilding and wheel throwing?
Most will. The needle tool, wire cutter, sponge, and rib work for both. The loop tool and modeling tools are mainly for handbuilding. If you’re focusing purely on wheel throwing, you’ll eventually want different tools.
How do I take care of pottery tools so they last?
Simple: rinse after use, dry completely, store in a dry place. Clay residue hardens and dulls tools. A quick rinse prevents that. Metal tools can rust if left wet, so dry them immediately. Most tools last years with this basic care.
What if I want to try pottery before investing in tools?
Taking a single class is a great way to explore pottery without buying anything. You get tools included, see if you enjoy it, and learn what you’d actually use. Then buy tools for home practice.
You now have what you need to start pottery without waste. You don’t need fancy equipment or expensive kits. The fundamentals: a needle tool, wire cutter, wooden modeling tool, loop tool, and rubber rib cost under $50 total and take you from beginner to confident.
Build from there based on what you actually make. Some people fall in love with texture tools. Others focus on clean lines and carving. There’s no “right” path- just the path that matches what interests you.
Grab the tools above, start making things, and discover what pottery means to you.
Disclosure: Some links on this page are affiliate links to Amazon. We earn a small commission if you purchase through these links at no extra cost to you. Thank you for supporting Happy Hands Pottery and Art Studio!

Related Articles

0 comments on "Beginner Pottery Tools: The Complete Studio Guide"